

Programming the SaBLE-x (CC2640)
This guide will walk you through programming the CC2640 (SimpleLink ultra-low power wireless MCU for Bluetooth Low Energy) from Texas Instruments. This will also work for any module that is based on this MCU, such as the SaBLE-x from LS Research. For the example provided in this post, the inexpensive SimpleLink SensorTag Debugger DevPack ($15) will program our SaBLE-x breakout board.
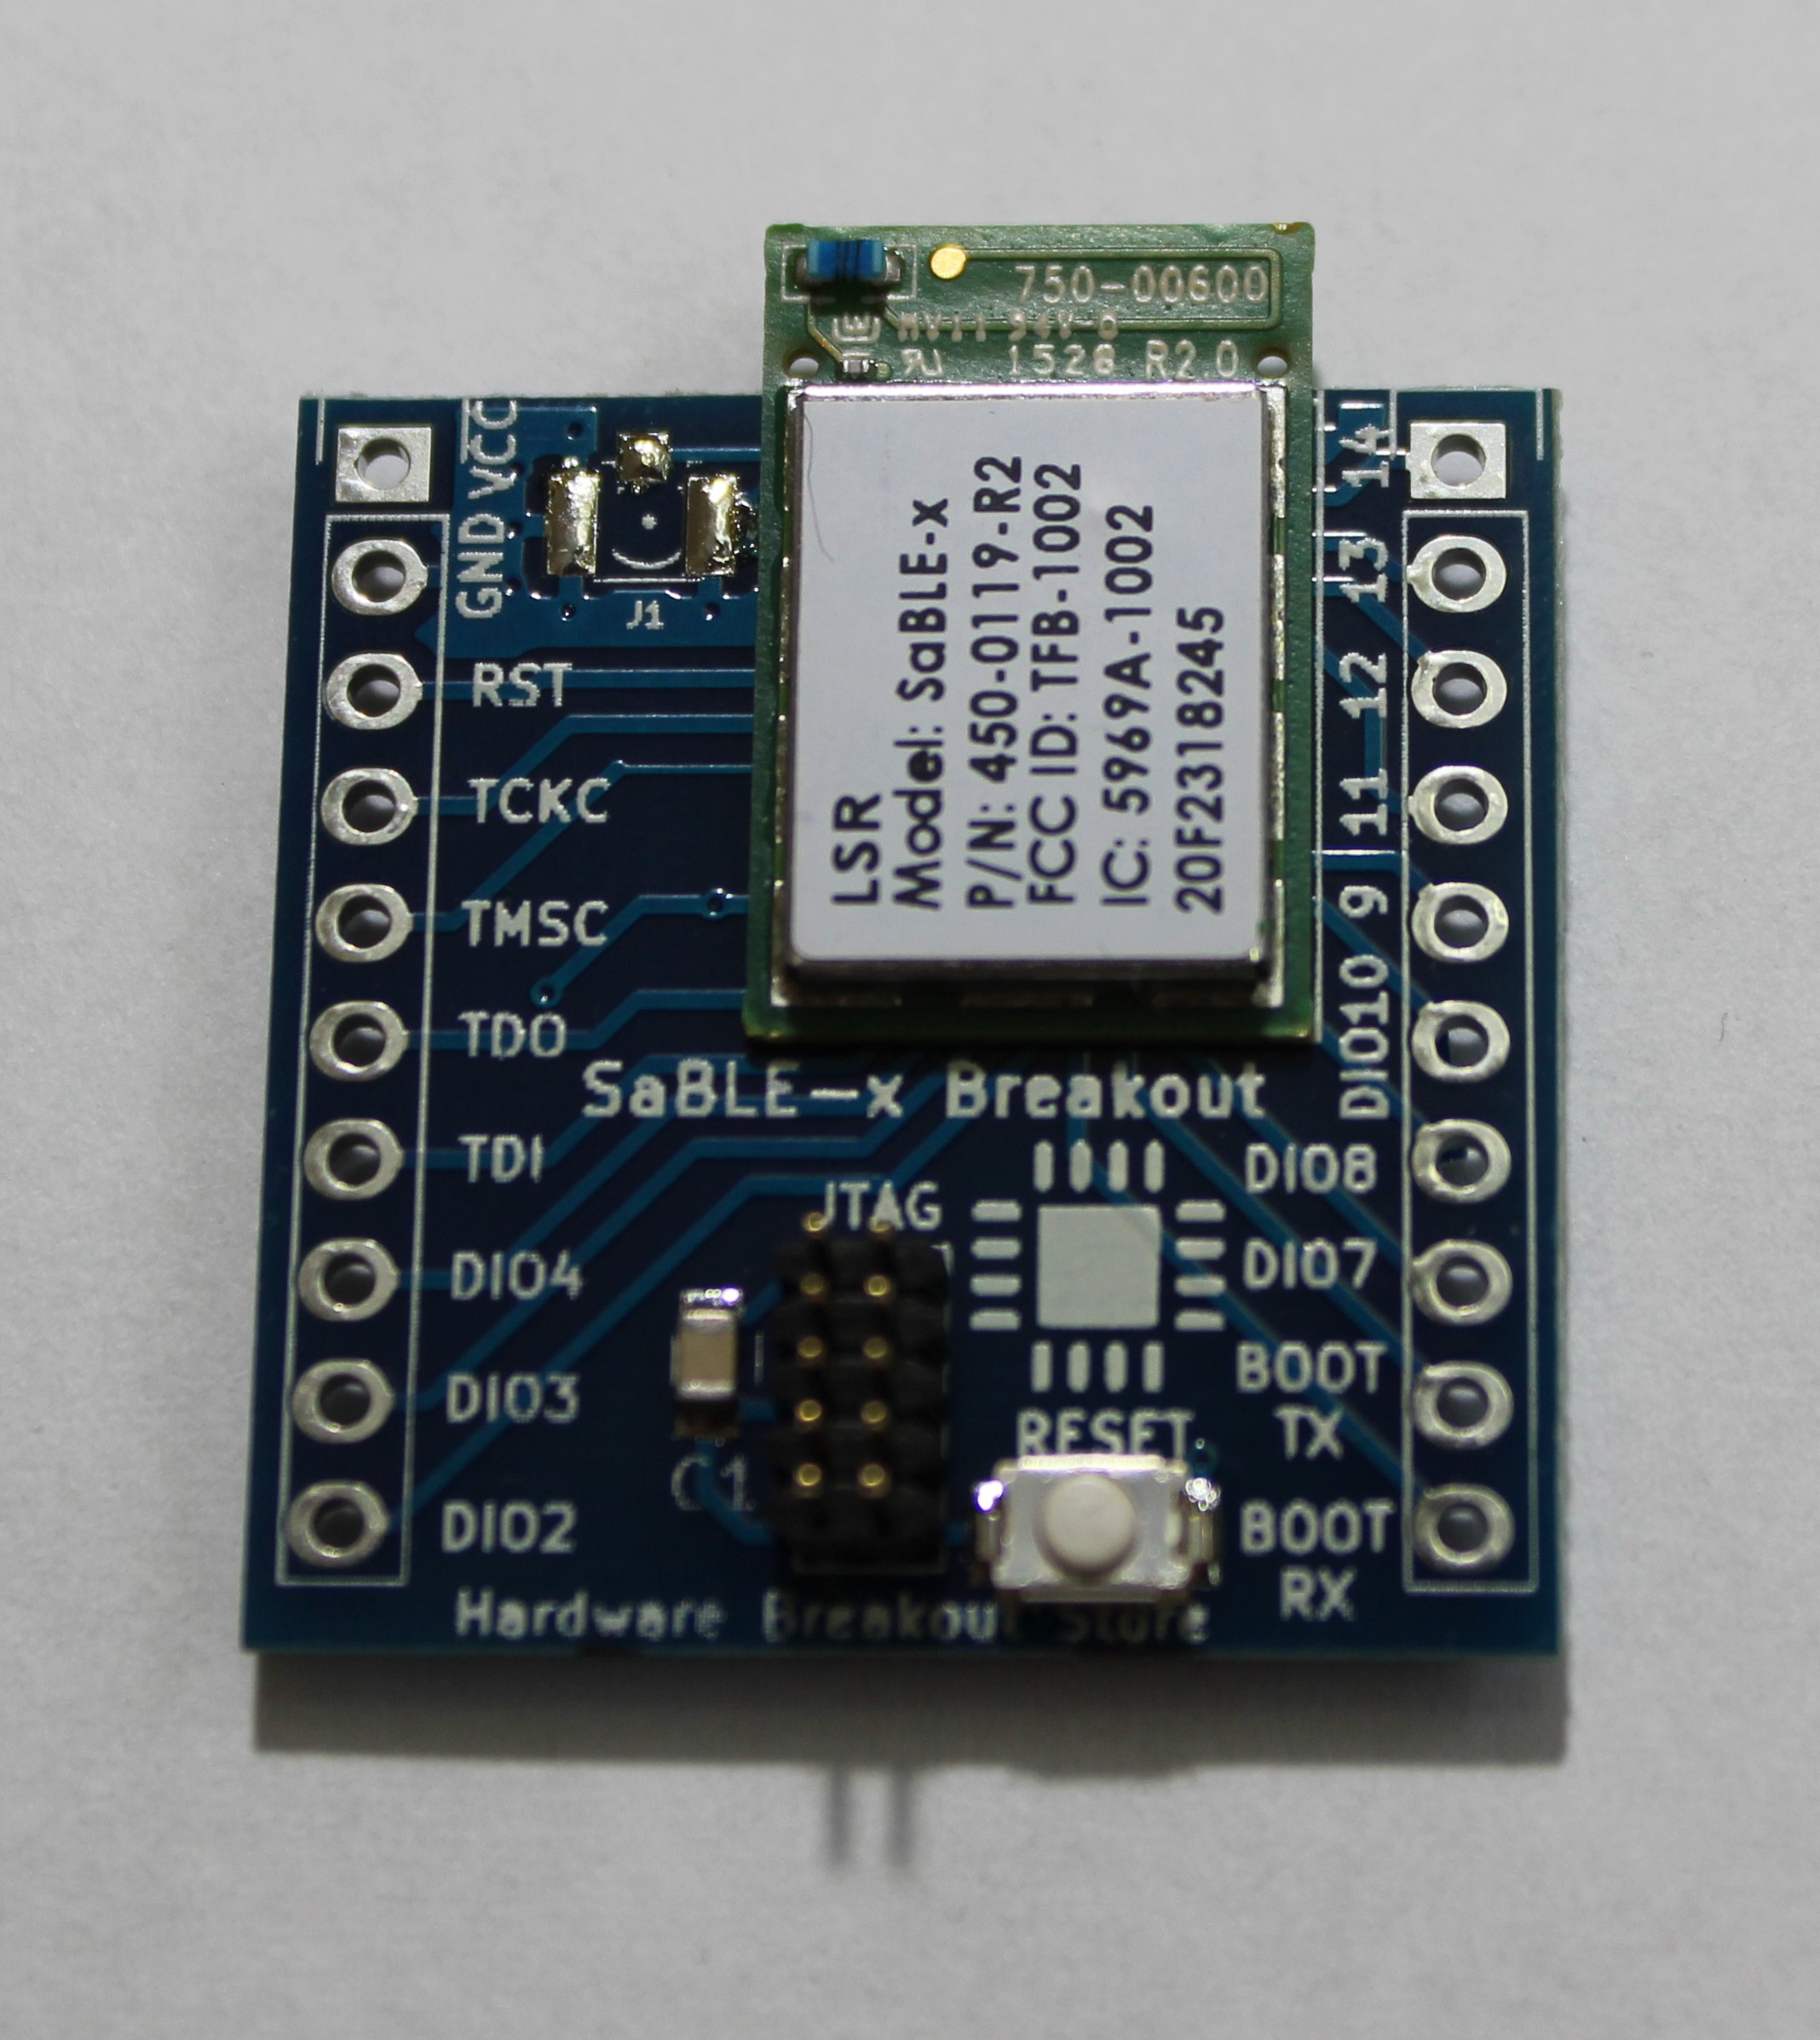
The SensorTag Debugger DevPack (the programmer) has the standard smaller pitch ARM JTAG connector, as does the SaBLE-x breakout board. We must now correctly determine the orientation of the programmer, since pin 1 is not marked on the programmer.
Programming Connector Orientation
In this situation, one naturally looks towards the documentation. As is often the case, the documentation can be very difficult to navigate and the information you need is not readily available. The correct documentation can almost always be found with a bit of tenacity and experience. In this case, the following documents from TI were helpful (or not so helpful) in determining the correct orientation of the programmer:
- DevPack User Guide – This was not particularly helpful, however it does clearly indicate what programming software is needed to flash the firmware.
- DevPack Product Page (Technical Documents) – A list of relevant technical documents that may be able to answer our question.
- DevPack Schematic – This does not answer our question on orientation. However it does confirm that the signals on the programming header (J2) match the SaBLE-x breakout board.
- DevPack Design Files (zip) – The design files often contain useful information. In this case, the assembly document should contain the orientation of the connector we are interested in (J2), but it does not. Digging deeper under the “PCB” folder, the Layout pdf has what we need.
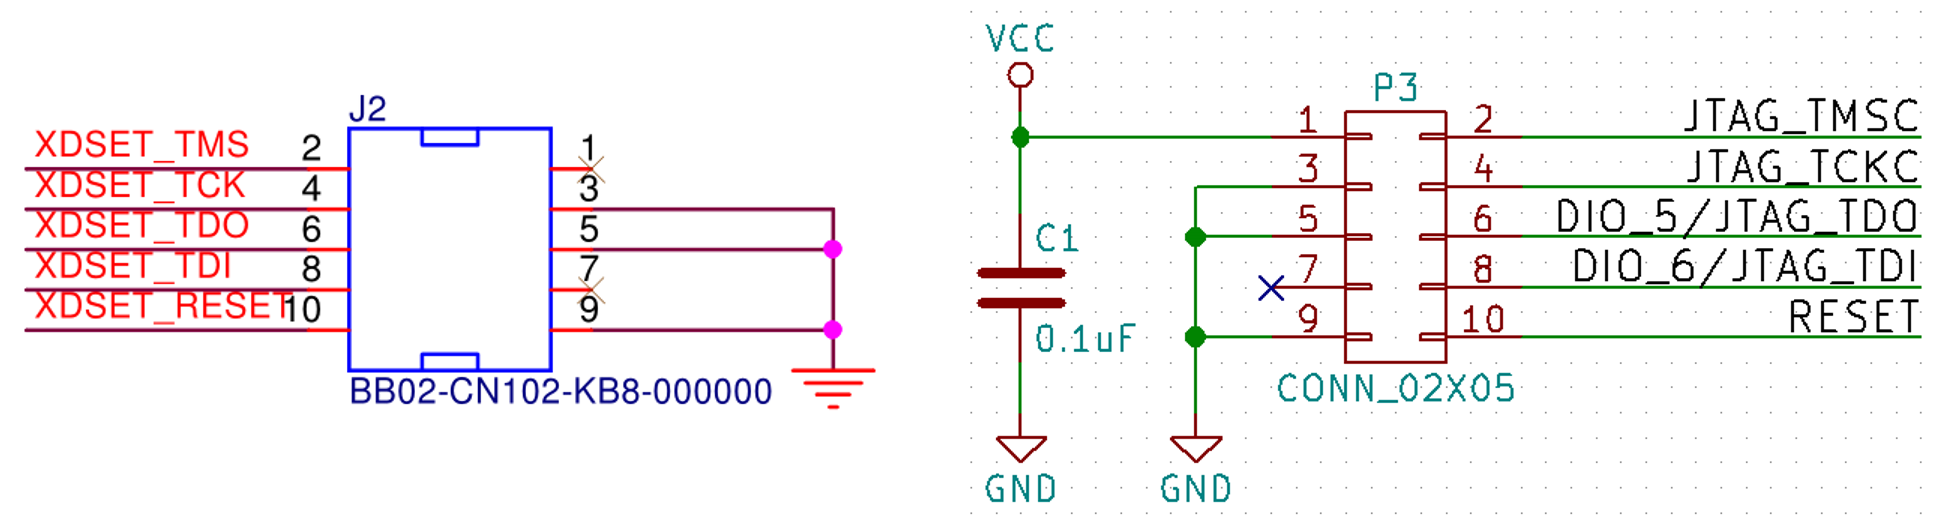
The programming connector schematic and pinout for the SaBLE-x breakout board is shown on the left, and the programming connector for the DevPack is shown on the right. The connectors are mirrored, which makes sense given that the DevPack connector is mounted on the bottom of the board rather than the top.
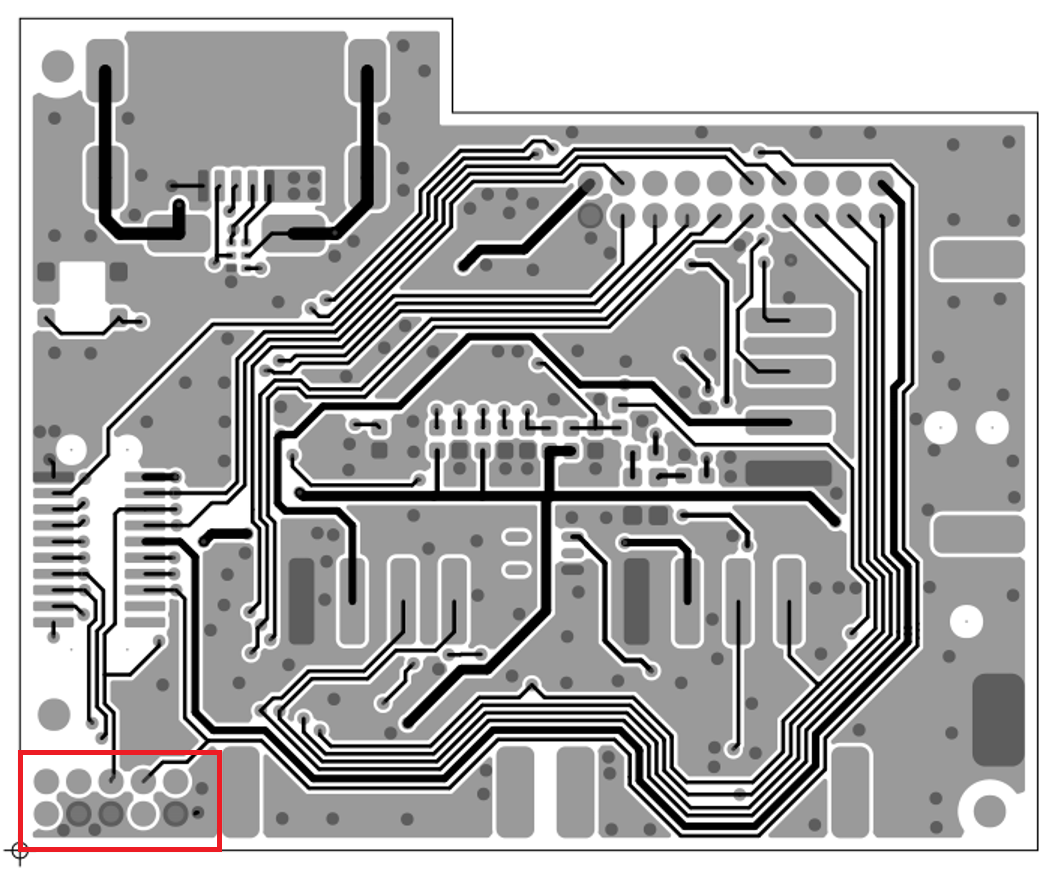
The layout pdf in the design files does not contain a label for pin 1, but it does show where the ground connections are (red box). This is enough for us to ascertain the correct orientation of the programming header.
Programming the SaBLE-x
Download and install the SmartRF Flash Programmer v2 from the TI website.
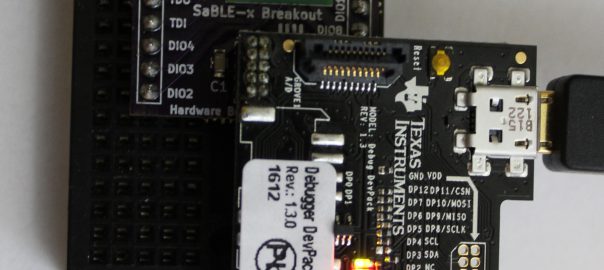
Connect the DevPack to the SaBLE-x breakout board as shown below. External power is needed since the programmer does not provide power to the breakout board (as you can see from the schematic). I use a 3V source from an old LaunchPad programmer. I also make sure to power the breakout board before plugging in the programmer with the USB cable.

Upon opening the programmer software, the DevPack should be automatically recognized. A firmware update may be required to use the DevPack. For me, it actually took two tries to get this to work. I simply had to unplug and replug the device in. This was also true for the software recognizing the CC2640. The first time I connected to the DevPack, I was unable to see the SaBLE-x module. Removing the power and unplugging the system seemed to do the trick.
You can now choose your firmware image from your disk (created through Code Composer Studio or IAR) and program away!