

Modifying a Toaster Oven’s Wiring
In the previous post I discussed building a reflow toaster oven from a systems level perspective. This post will dive into choosing a toaster oven and modifying the internal wiring. Before working on the rest of the system, you should choose your toaster oven. This will ensure that the relay we choose can handle switching the amount of power the toaster oven needs.
As I mentioned in the last post, it is very important to use a toaster oven which has four heating elements and a convection fan. If you buy a cheap toaster oven which has fewer than four heating elements or lacks a convection fan, the oven will not heat up quickly enough nor will the heat on the PCB be evenly distributed.
The toaster oven I will be using for this project is a Black and Decker model which I purchased from Walmart. Despite this oven being somewhat expensive, it has four heating elements and a convection fan making it ideal for this project. Here is a link to a more expensive toaster oven on Amazon that would also be perfect for this project. Before buying your oven, take a look at its wattage. The wattage should be about 1500W; generally speaking the higher the wattage, the hotter it can get and the faster it will heat up. My oven is a 1500W oven.
Taking Apart the Oven
Taking a toaster oven apart is not a trivial matter, at least if you don’t want to break anything! Keep track of where every screw goes and try your hardest not to brute force any part of the oven. Once your oven is apart, it should look something like this.
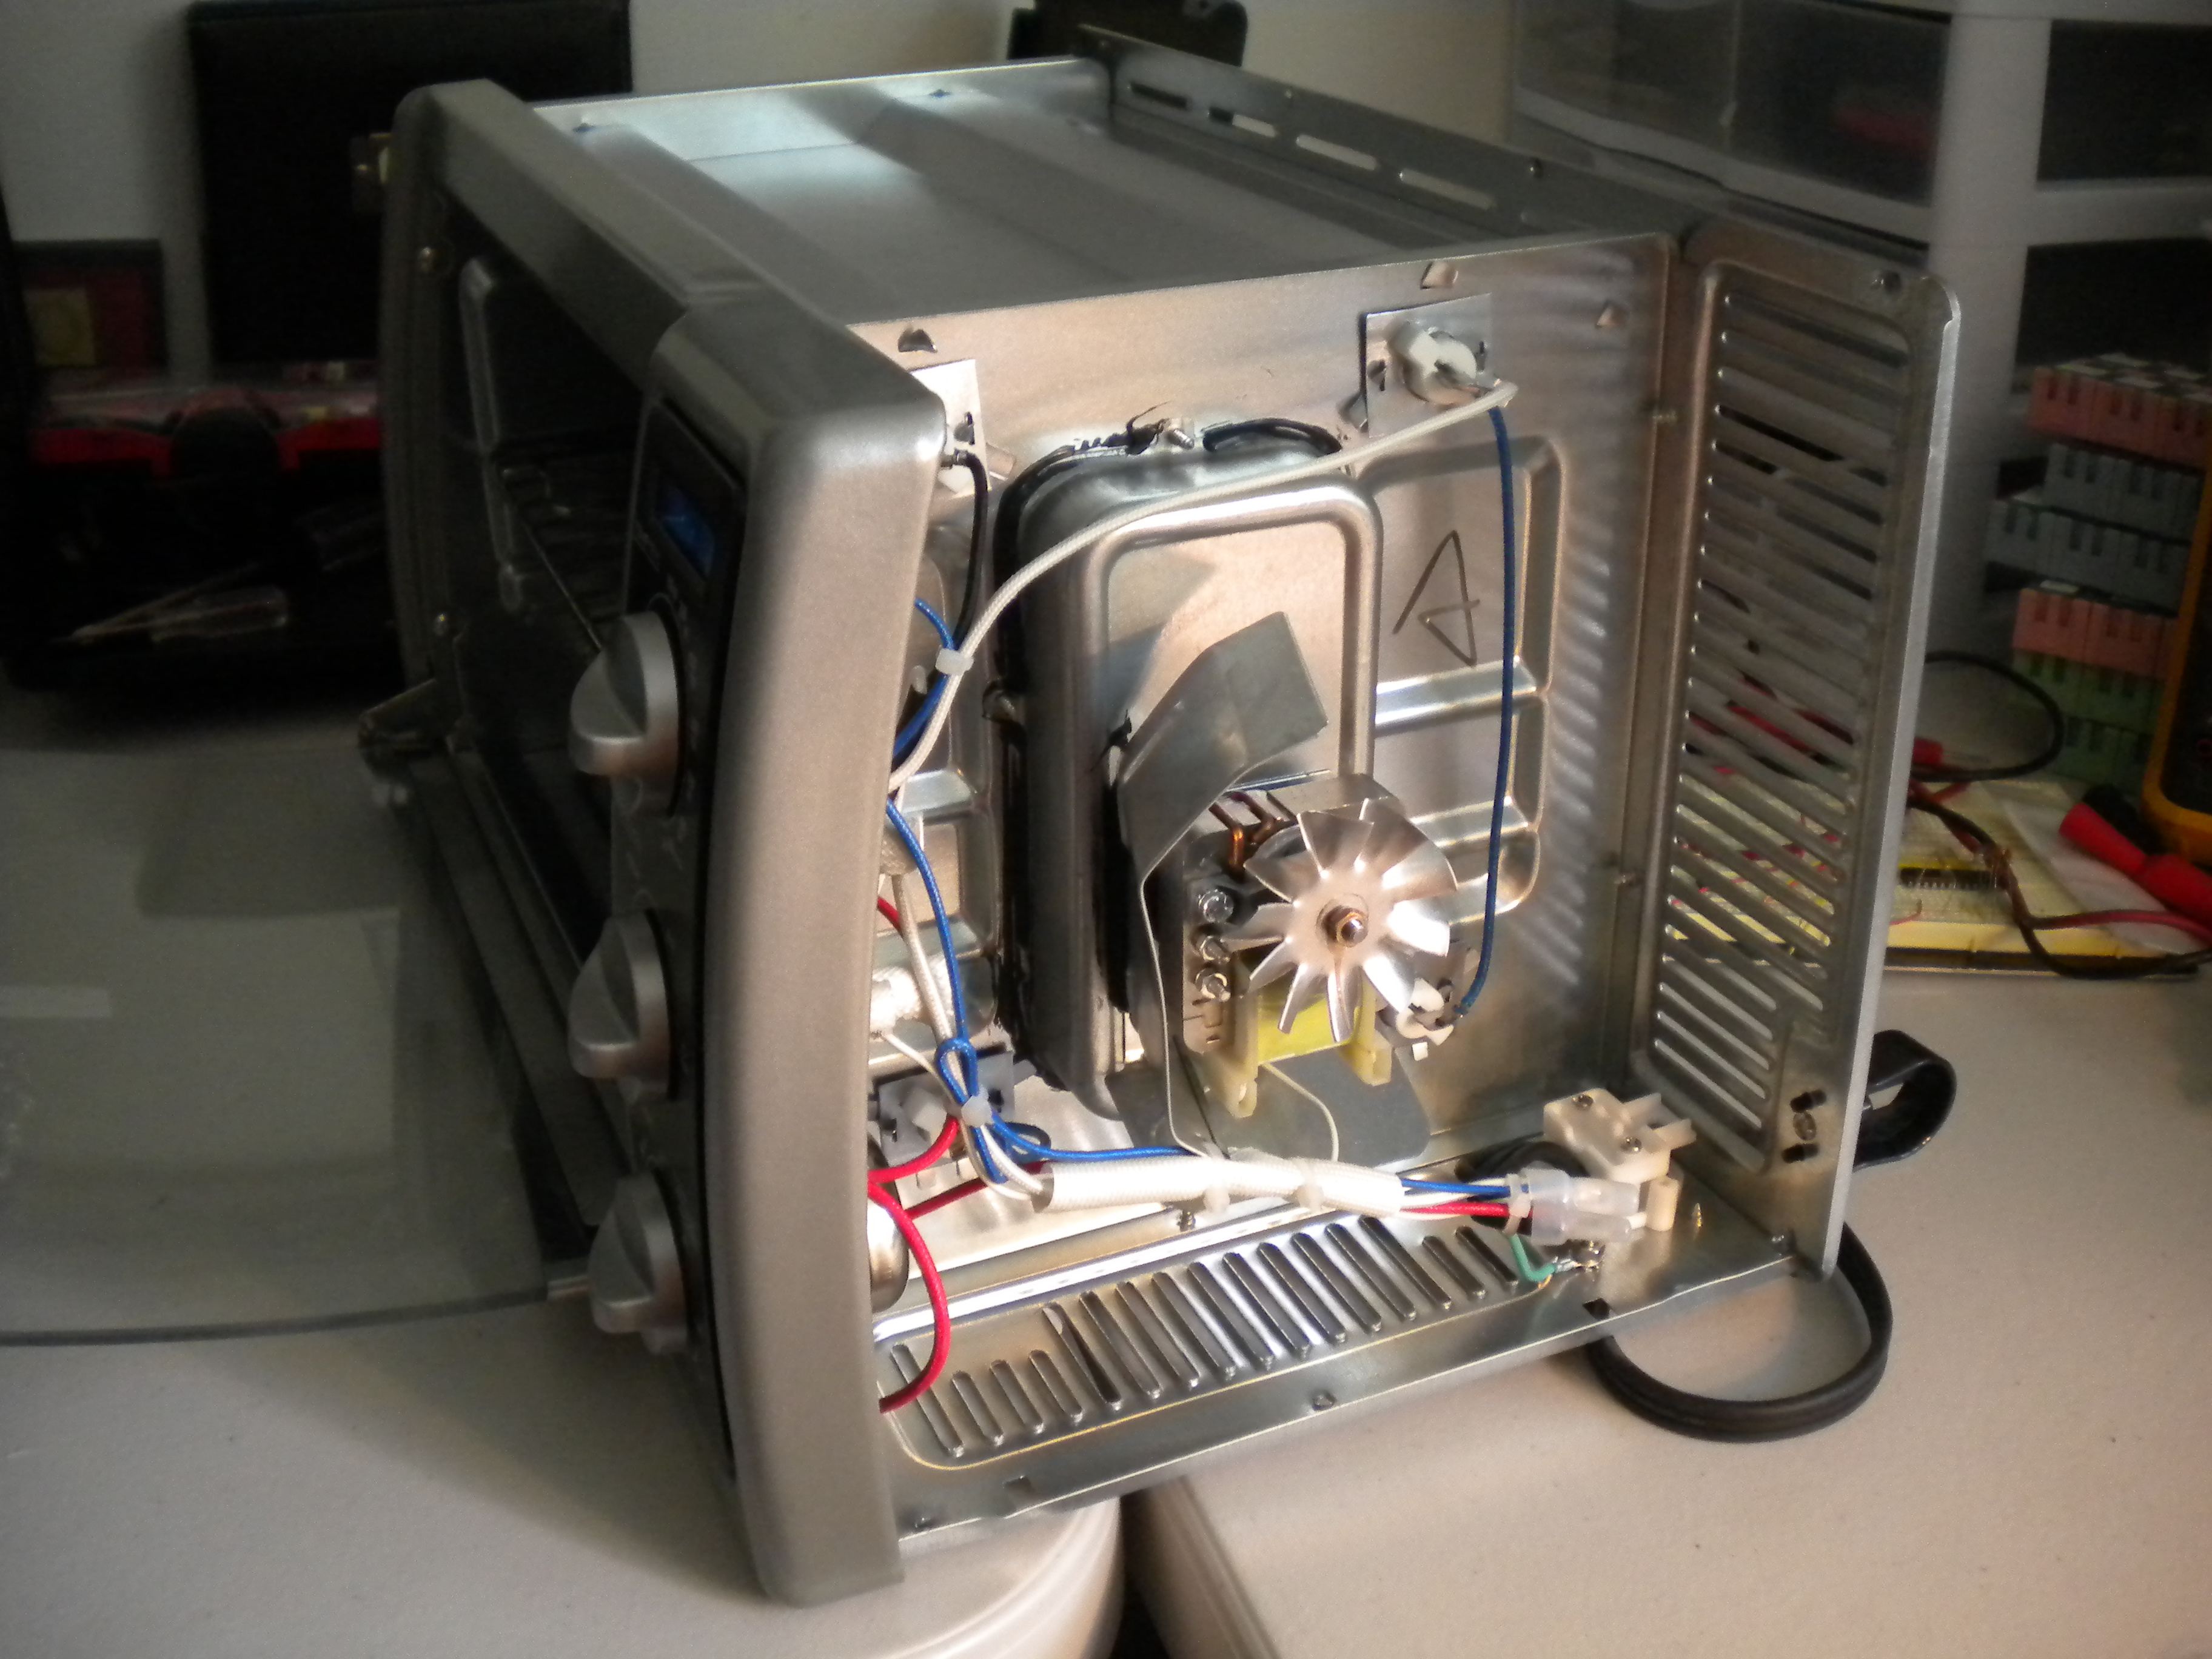
My oven has three control knobs; the top is the temperature control, the middle sets which heating element is chosen, and the last is a timer.
Please note: This is not something that you should try if you are not familiar with high voltage systems. A toaster oven contains high voltage signals which can kill you. Proceed at your own risk. Do NOT attempt this project unless you really know what you are doing.
Now that I have the oven apart, I took my multimeter to it! I turned the oven on, played around with the settings, and measured the voltage on each heating element. Interestingly enough, the top heating units were driven with 60V (this is half of 120V, the mains voltage in the US). Apparently, having the top heating elements turned all the way on would be overkill for food; this is not true for a reflow oven! We want to have all of the elements turned on at full force, so the switching control will need to be bypassed.
Instead of replacing the timer control knob with a relay circuit, I decided to keep the timer circuit for safety. By setting the timer to 10 minutes at the start of a PCB run, I will have an additional safeguard in case I forget to turn the oven off for any reason. I disconnected the temperature knob and the oven mode knob and wired up the device so that all the heating elements will be completely on when the relay turns on; otherwise everything will be turned off.
The Wiring
How should you wire your toaster oven? While there are many ways to do this, I have chosen the following method.
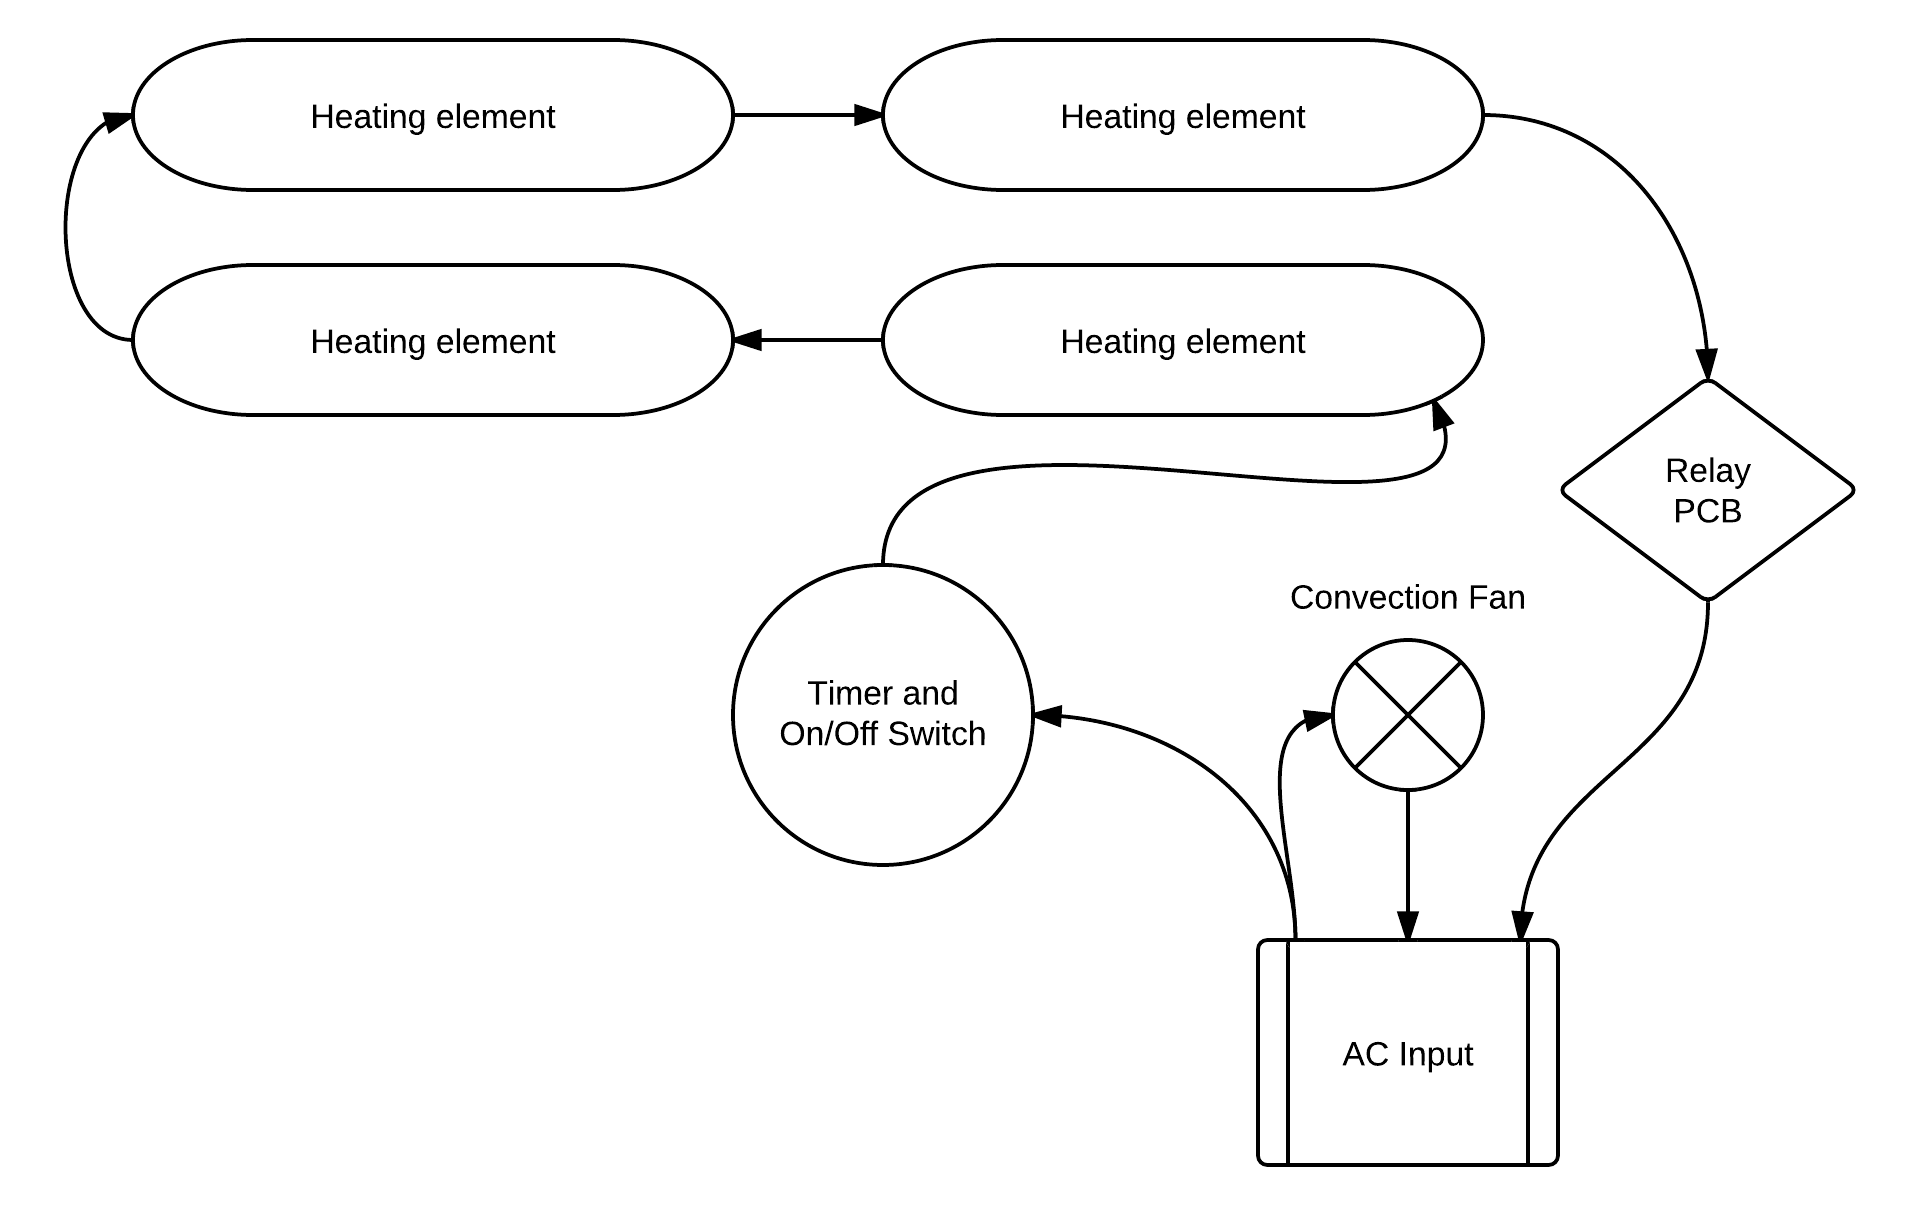
Block diagram of the toaster oven’s internal wiring.
The above picture shows a block diagram of how I plan to wire the toaster oven. Note that the relay is connected between the final heating element and the negative AC input. There is no particular reason for putting the relay here, rather than directly in front of or behind the timer. The reason I wired up the relay this way is because it made the wiring significantly more simple on my specific oven. Take a look at your oven and plan ahead; taking the time to do so makes all the difference.
What About the LCD??
In our last post, I mentioned that there would be an LCD which displays the current temperature and the temperature curve. This is where a Dremel really comes in handy. For those of you with no means to cut metal, you can attach the screen to the outside of the oven and simply bring out the relay control wires to the microcomputer. Since I have a Dremel (which is an amazingly useful tool), I ended up cutting out a square hole for the LCD where the temperature control knob used to be.

The square hole cut for the LCD using my Dremel.
Be patient when using your Dremel! Otherwise you will have a messy hole for your display; because I was impatient, my cutting job is not as clean as it should be! Oh well!
Preparing for the Relay
Many toaster ovens use a standard #250 tab terminal connector for the internal wiring. This is very useful! You can purchase relays which have this connector built in, allowing you to further separate the high voltage signals from your low voltage signals on the relay PCB. I will discussing this more in the following post on the relay circuit.
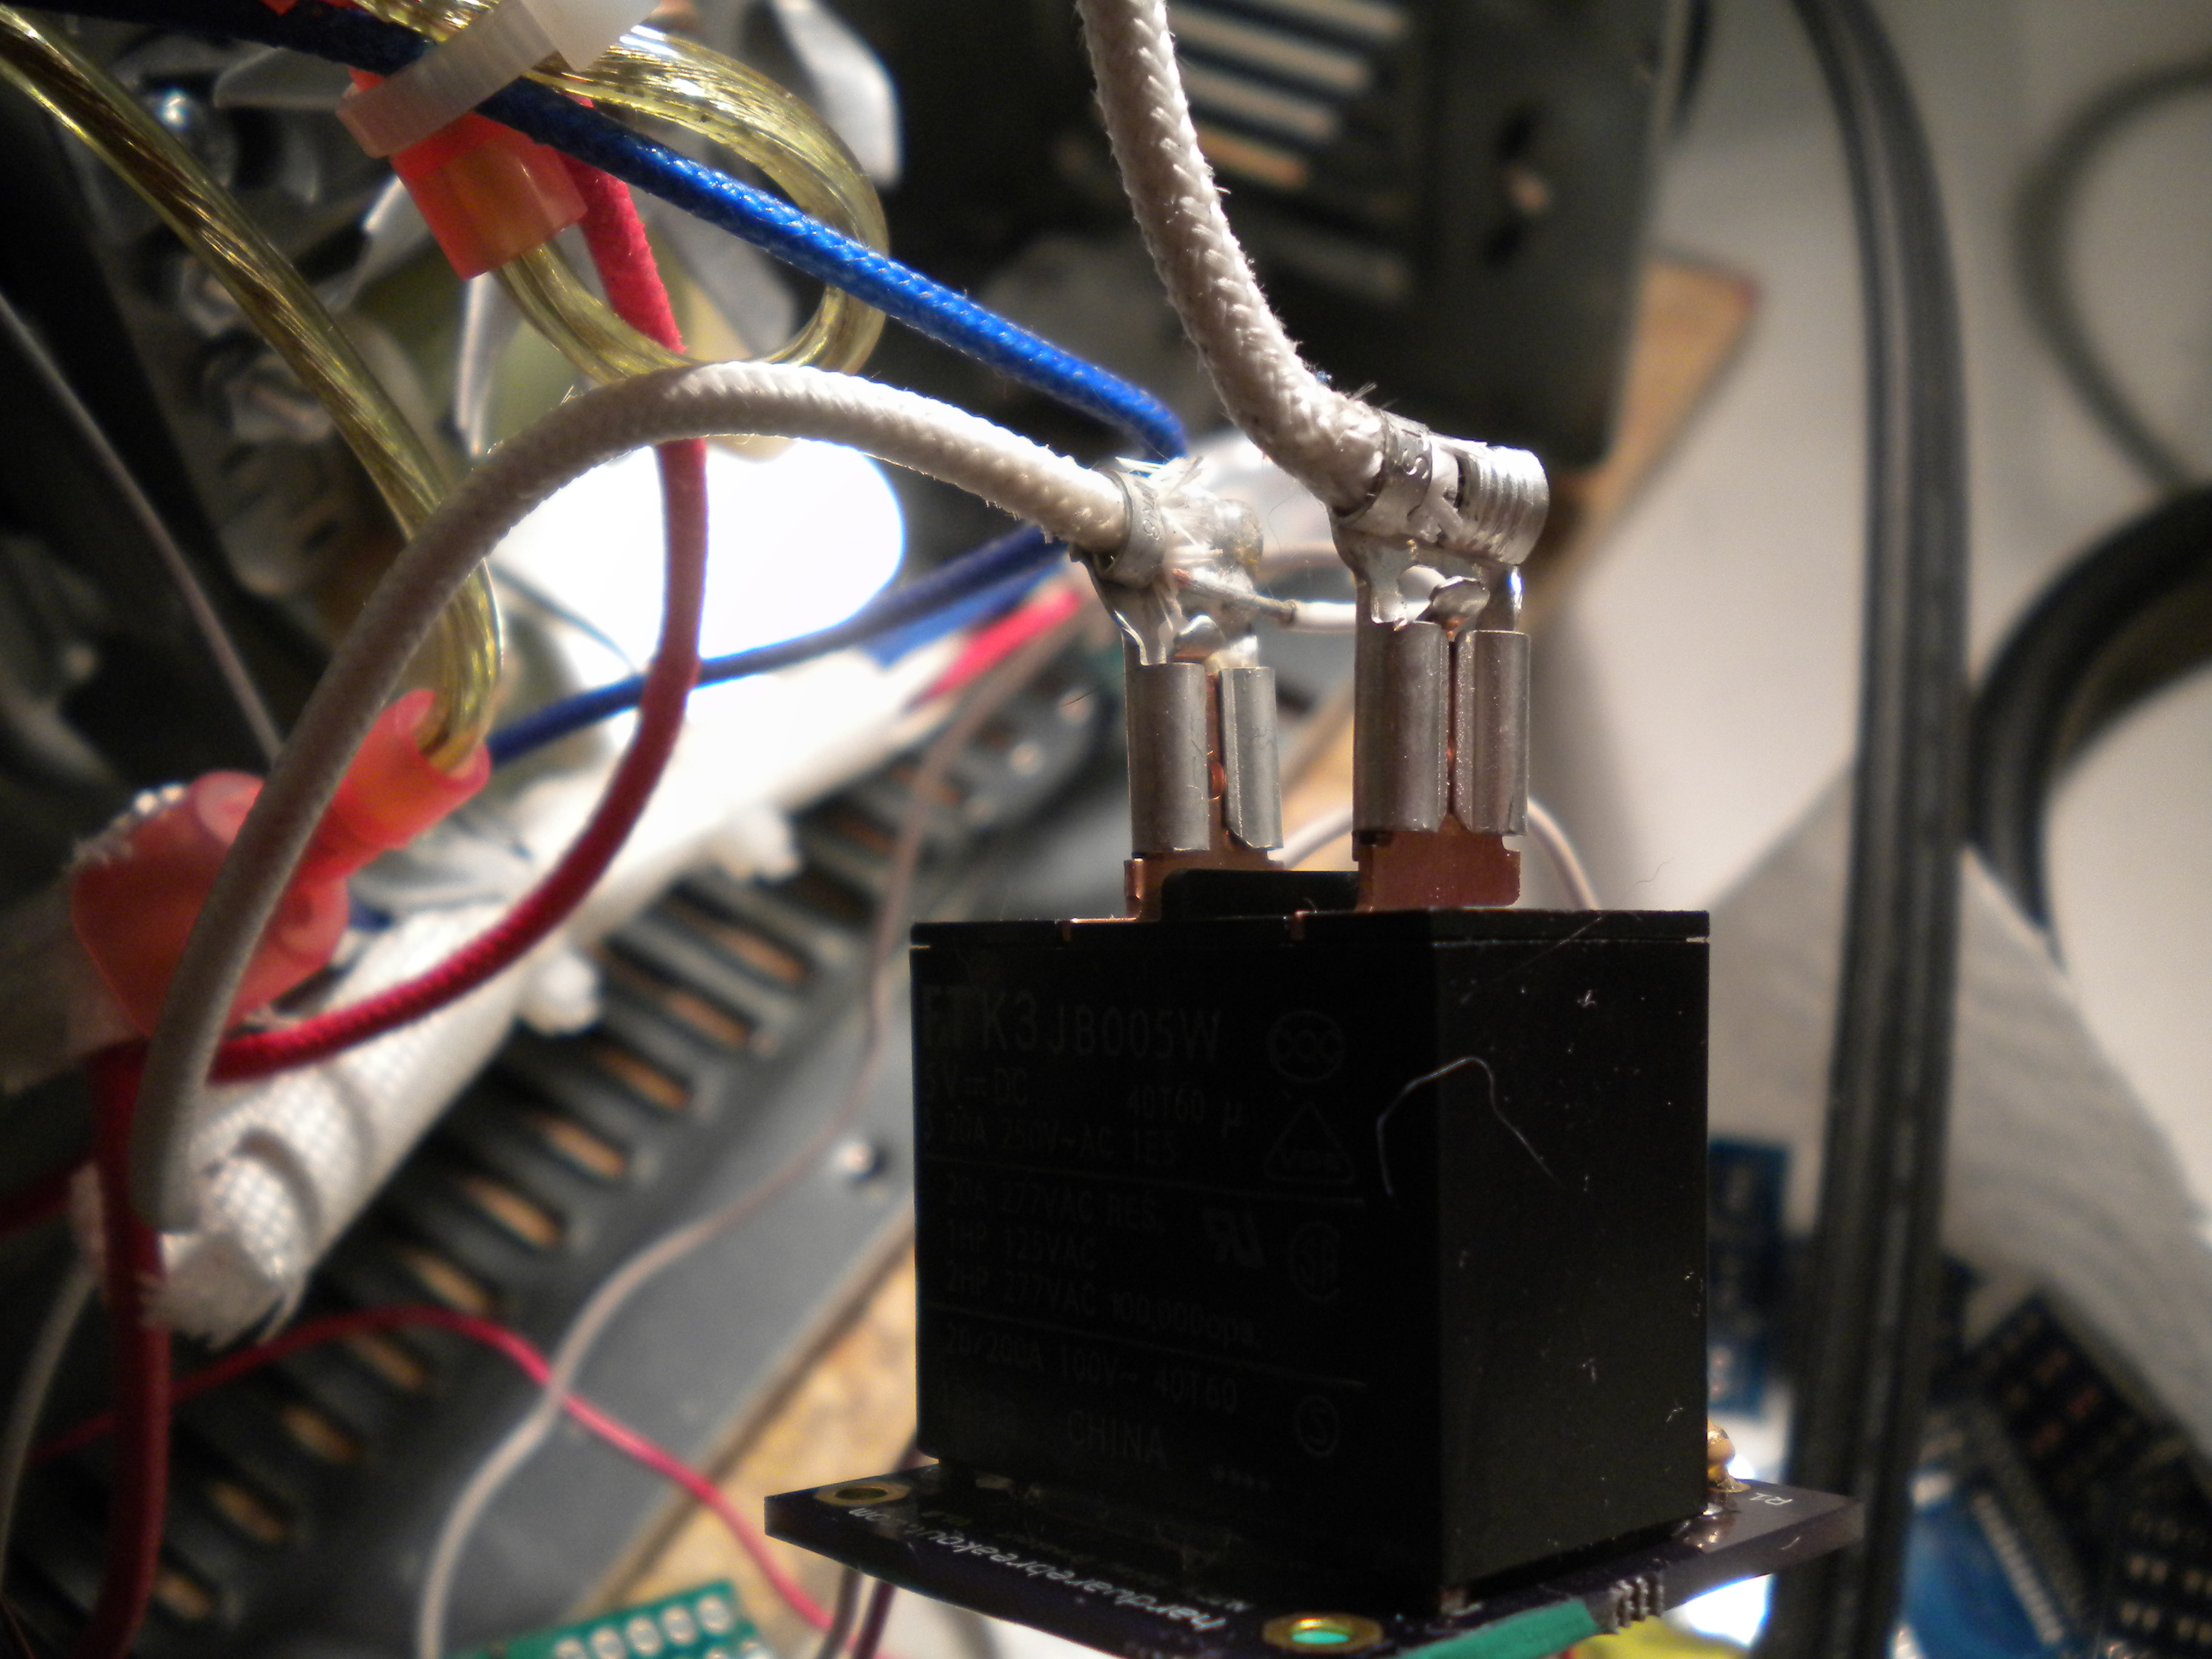
The toaster oven’s terminal connectors connected to the relay.
The image above shows these standard connectors in my toaster oven. These connectors are available at any hardware store (Lowes, Home Depot, Amazon). All you need is a crimper and the correct gauge wire. These connectors really make things easier. The less we have to cut and solder the original wiring, the better.
Conclusion
Be careful when you modify the wiring in your oven. Use zipties to keep your wiring clean and use electrical tape (or liquid electrical tape) to prevent shorts. Our next post will discuss the relay circuit. Stay tuned!
Hi, I need somebody to help me to fix a toaster oven, in fact i want a picture or a photo to describe all the conecctions. my toaster oven is a Erick-son Thanks!!!!
I need help – looking at this site – I need to know where to buy the thermostat. Mine is KSD201 175ºC 125V 15A or equal with 15A.